One of the most popular foods around the world is red chili peppers. Having appeared in Europe in the 15th century, this vegetable has firmly entered the traditional menu of many countries. One of the advantages of hot pepper is the ability to grow it not only in the garden and in the greenhouse, but simply on the windowsill in the apartment. How to grow a hot pepper bush at home is described in this article.
Suitable varieties
A variety of varieties of indoor chili makes it possible to arrange an extravaganza of colors and taste on the windowsill:
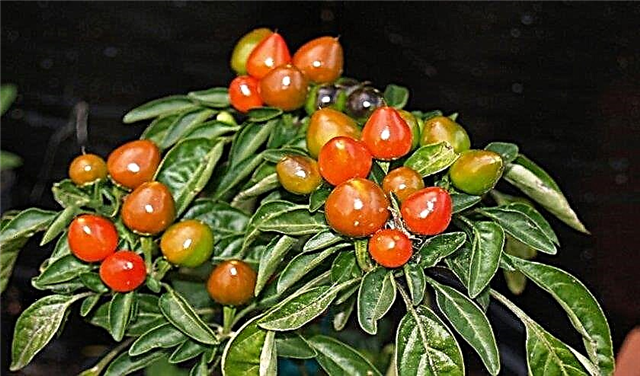
- "Confetti". A compact bush with a height of 35 cm. Fruits - up to 7 cm in length, ripen with "waves" from green to scarlet and purple. A bush strewn with multi-colored sharp cones adorns the windowsill all year round.
- "Indian summer". In the flowering stage, strewn with small white and purple inflorescences. Burning red balls in dense foliage ripen in 100 days. Unpretentious variety, well developed on the sunny side and in the shade.
- "Spark." One of the most common types of indoor chili. Fruits are long, bright red, burning-sharp, weighing up to 45 g. Ripen in 120 days from the appearance of seedlings. A properly formed branching crown resembles a bonsai tree.
- "Aladdin." Long, conical-shaped burning red fruits have a pleasant aroma. In the stage of technical ripeness, they have a color from cream to violet, biologically mature - red. The variety is suitable for indoor and outdoor cultivation.
- "Variegated fish." Mid-season variety (from 75 to 100 days). Long oval fruits have a striped coloring in the stage of technical ripening - the alternation of green, yellow, red, purple and brown stripes. Heat-loving bush up to 30 cm high.

- "Bell". The highlight of the variety is an unusual shape, reminiscent of a dark red squash, suspended on a stalk. The burning taste of the placental region is set off by a sour-sweet taste in the rest. Late-ripening variety (150 days from emergence), requires pinching. Weight - 70–90 g.
- "Nosegey." The smallest among hot peppers growing in indoor conditions is 15 cm in height. The ripening round balls of medium severity change color from green, cream and orange to scarlet.
- "Salute". On a 20 cm bush in 95 days the fruits ripen in the form of pointed cones, the color - from green to orange. Peppers are suitable for seasoning, canning, eating raw, have a pungent-spicy taste with a spicy note.
- The Queen of Spades. Mid-season variety, bears fruit all year. The mass of glossy peppercorns is 6 g, the shape is a pointed cone. In different phases of ripening, it changes color from green, yellow, purple to dark red.
- Filius Blue. Height - 20 cm. It blooms and matures all year round. Small, round, tapering in the form of a cone fruits when ripe, change color from violet to red, have a pungent spicy taste. The plant loves sunlight and fertilized soil.




Growing seedlings from seeds at home
To grow hot pepper at home, you can sow the seeds immediately in a permanent pot, however, it is better to grow seedlings first. To do this, you need to know how to sow the seeds, how to prepare the soil and capacity for them, as well as how to take care of the seedlings, so that later they grow strong healthy bushes.
Sowing dates
Sowing seeds of decorative pepper for seedlings is necessary taking into account the timing of fruit ripening: later species reach biological maturity in 120–150 days, medium ones in 100–120, early ones in 65–100 days.
We list a number of varieties with different ripening periods:
- Early grades: "Medusa", "Aladdin", "Spark", "Explosive ember", "Tabasco" and others. Sown in mid-February.
- Mid-season: The Queen of Spades, Holly Fish. Landing in late February - early March.
- Late varieties: "Bell", "Confetti." It is better to sow in mid-March.
Important! Indoor pepper can be sown at any time, but spring seedlings are considered the strongest, such a plant is able to give more fruits: due to increased daylight hours, the root system and trunk are better strengthened.
Capacity for landing
The choice of containers for sowing depends on how many young seedlings are planned to be received. It is also necessary to take into account the volume and depth of the pot or box in which the seedlings begin to appear.
- It is best if there is a separate container for each sprout. Round, square, plastic or paper cups work equally well. The required height is 8–10 cm, volume is 150–250 g. Drainage holes are mandatory.
- A box for seedlings can be made independently. The main thing is that it can be placed on the windowsill for better access to sunlight. The height of the side is 9–10 cm, the drainage holes are 2 × 3 cm squares.
- Peat cell containers are also suitable for growing hot chili at home. Cassettes need to be placed on a pallet, or to line the window sill with a film so as not to spoil the surface.
- Peat cup or tablet is the optimal capacity for seedlings of decorative pepper. Separate containers with natural walls simultaneously serve as fertilizer. It is better to place cups on one stand - it will be easier to care for seedlings.
Suitable substrate
For a good growth of hot pepper seedlings, high-quality, properly prepared soil is required:
- Sift the sheet soil (3 kg per 1 plant) carefully, remove all impurities, such as roots, small stones.
- To disinfect soil. There are several methods: steaming with boiling water, calcining in an oven, processing with a hot solution of potassium permanganate, the use of Fitosporin.
- Mix the prepared soil in equal parts with sieved humus, peat, sifted through a fine sieve and peeled from garbage.
- Add a quarter of the volume of sand.
- To stir thoroughly.
Important! If the acidity of the soil mixture is increased, you can lower the pH by adding wood ash: 3-4 tablespoons per 1 kg of soil.
You can also use special primer from the store. The acidity of the substrate should not be higher than 7 pH.
Presowing seed treatment
Potted chili seeds are best purchased at a special store. It is not necessary to grow seedlings from the seeds of an ordinary vegetable purchased in a store: such products are grown industrially in a greenhouse, with the support of a certain microclimate.
Preparing seeds for planting is necessary according to this scheme:
- Sorting. Remove damaged and spoiled grains. Empty seeds can be determined by placing them for several minutes in a saline solution (1 liter of water, 10 g of salt): bad seeds will emerge.
- Disinfection. It is carried out with a solution of potassium permanganate for 15 minutes. Then you need to thoroughly rinse the seeds with running water, dry on a cloth or paper. You can also use special preparations against plant fungi, carefully following the directions on the package.
- Pepper tree will grow stronger if the seeds are pre-soaked in a nutrient solution. You can use strained daily infusion of wood ash (20 g per 1 liter of water). Growth stimulants, widely represented in specialized stores, will simultaneously serve as top dressing and disinfectant.
- Germination. Performed for better seed germination and pre-seedling rejection. On a cloth or paper copiously moistened with water, in a single layer, spread the seeds and cover with a damp cloth on top. Prior to seed germination or swelling, the tissue must be kept moist at all times. Germination of seeds helps to determine the germination of pepper, discard the "blank" seeds before planting in the ground, reduce the time of germination of seedlings.
Did you know? Capsaicin, contained in chili pepper, activates the metabolic processes in the body and contributes to better fat burning.
Sowing seeds
In a container for sowing seeds, pour a layer of expanded clay drainage (2-3 cm) and soil in 2/3 of the capacity. Lay out the seeds and cover with a soil layer of 1.5 cm. If sowing is in long boxes, the seeds should be planted in a space of 5 × 6 cm. This distance will prevent damage to the roots when transplanted into separate pots. Seeds are covered with a layer of earth of 1.5 cm. Water abundantly, using a spray, so as not to wash the planting material to the surface.
Germination conditions
Indoor pepper bears fruit all year round, so you can sow it at any time of the year.
For the successful germination of seedlings, a number of conditions must be observed:
- Seedling containers should be placed on a flat, well-lit surface.
- It is not artificially required to increase daylight hours - then seedlings do not stretch, but build up the root system.
- The container for rapid germination of seedlings must be covered with a film or glass, and after the appearance of leaves - remove.
- The required room temperature is 20–25 ° С. To accelerate germination, you can additionally heat the container with seedlings by placing a table lamp at a distance of 15-18 cm above the surface.
- It is necessary to constantly maintain moisture in the soil by irrigating the surface with a spray gun.
Pick
Transplanting seedlings “for permanent residence” is possible after the appearance of 2–4 leaves. Decorative pepper does not like diving, in which there is a risk of disturbing the root system.
Therefore, the best method of "relocation" is transshipment:
- it is good to spill the soil in containers with water until completely wet;
- gently pry off a lump of earth with a small garden shovel along with the plant;
- set the seedling in the center of a constant capacity, in the prepared recess in the ground;
- water gently, directing the flow of water into the soil around the sprout;
- sprinkle with the remaining soil, slightly compact it around the sprout;
- make sure that in the first few days the soil is constantly moist, but do not fill the pot.

Further care
Decorative varieties of indoor pepper are generally unpretentious. With the correct lighting conditions, temperature and top dressing, they generously bear fruit all year round, pleasing both the look and the stomach of the owners.
Lighting
Light is an important condition for the formation and growth of both a powerful bush and the fruits of indoor hot pepper. In the phase of growth, flowering and ripening of fruits, that is, constantly, chili requires a long daylight hours. Therefore, during the off-season, you must additionally use fluorescent lamps for 1 hour in the morning and evening.
Temperature mode
Pot peppers love warmth. The optimum plant development temperature is +22 ° C. To avoid inhibition of growth during temperature changes, plants should be tempered at the seedling stage: after the 6th leaf appears, take out the sprouts on the balcony, starting from 15–20 minutes and gradually increasing the time.
The procedure will help hot pepper easier to tolerate a drop in temperature in the cold season.
Pollination
For cultivation on the windowsill, it is better to choose self-pollinating varieties, such as “Twinkle”, “Indian Summer”, “Ryabinushka”, “Medusa”. Point additional pollination will help increase the number of fruits on the bushes. Exotic varieties, for example, Filius Blue, Variegated Fish, require additional additional pollination. The procedure should be carried out according to this scheme: lightly shake each flower in a row with a cotton swab so that the pollen falls on the uterus and an ovary of a new fruit appears.
Did you know? The easiest way to pollinate indoor chili peppers is to shake the pot lightly to bluebells of flowers "Swayed."
Watering
Indoor hot peppers like water in moderation. Daily water procedures strengthen the root system, contribute to better growth of the bush and ripening of fruits. In the hot season or during heating, you need to moisten the soil every 5-6 hours.
Hot batteries near the decorative pot must be covered with a damp cloth so that the air around is not too dry.
Top dressing
Intensive growth and fruiting of hot pepper are ensured by regular application of nutrients: once every 7 days, you need to water the plant with a solution of mineral fertilizers at the rate of 3-4 g per 1 liter of water. For this, phosphoric, potash fertilizers are suitable. Chile also loves organics.
The monthly addition of cow manure (in a ratio of 1: 4) or chicken droppings (1 part of fertilizers to 10 parts of water) helps to strengthen the roots, branches, better flowering and fruit setting.
Be sure to do mineral top dressing in the fall, using universal fertilizers or special mixtures for decorative types of chili. The last procedure should be carried out in late December.
Pruning
In the fall, after harvesting, the bush needs to be cut to one third to rejuvenate the crown. Such pruning stimulates the formation of new peduncles. In addition, it is necessary to reduce the amount of water during irrigation, as well as to completely eliminate fertilizing and resume it in mid-January.
During the dormant period, the plant will restore strength, strengthen the root system and branches.
In addition to pruning, a pepper bush at the age of 1 year must be transplanted into a new larger container and further transplanted annually.
Harvesting and storage
Hot pepper is able to produce crops for 5 years. Chili fruits ripen in stages, changing colors in the phases of technical and biological ripeness. In a cold place, fresh peppers can be stored for several months without losing their taste and appearance. You can also dry ripe fruits - for this you need to stretch a nylon thread or fishing line through the stalks of peppers and hang them in a dark, dry place.
In addition to drying, chilli can be pickled - they will be a spicy addition to your favorite dishes. A small tree with sharp peppers, standing on the windowsill, cheers up in gray autumn weather, and its bright fruits enhance immunity in the winter and add piquancy to the daily menu. Proper care and regimen - that’s all it takes for a plant to delight for a long time with an abundant crop of burning chili.


